Photographing the Lecrin Valley Fire
About the Lecrin Valley Fire
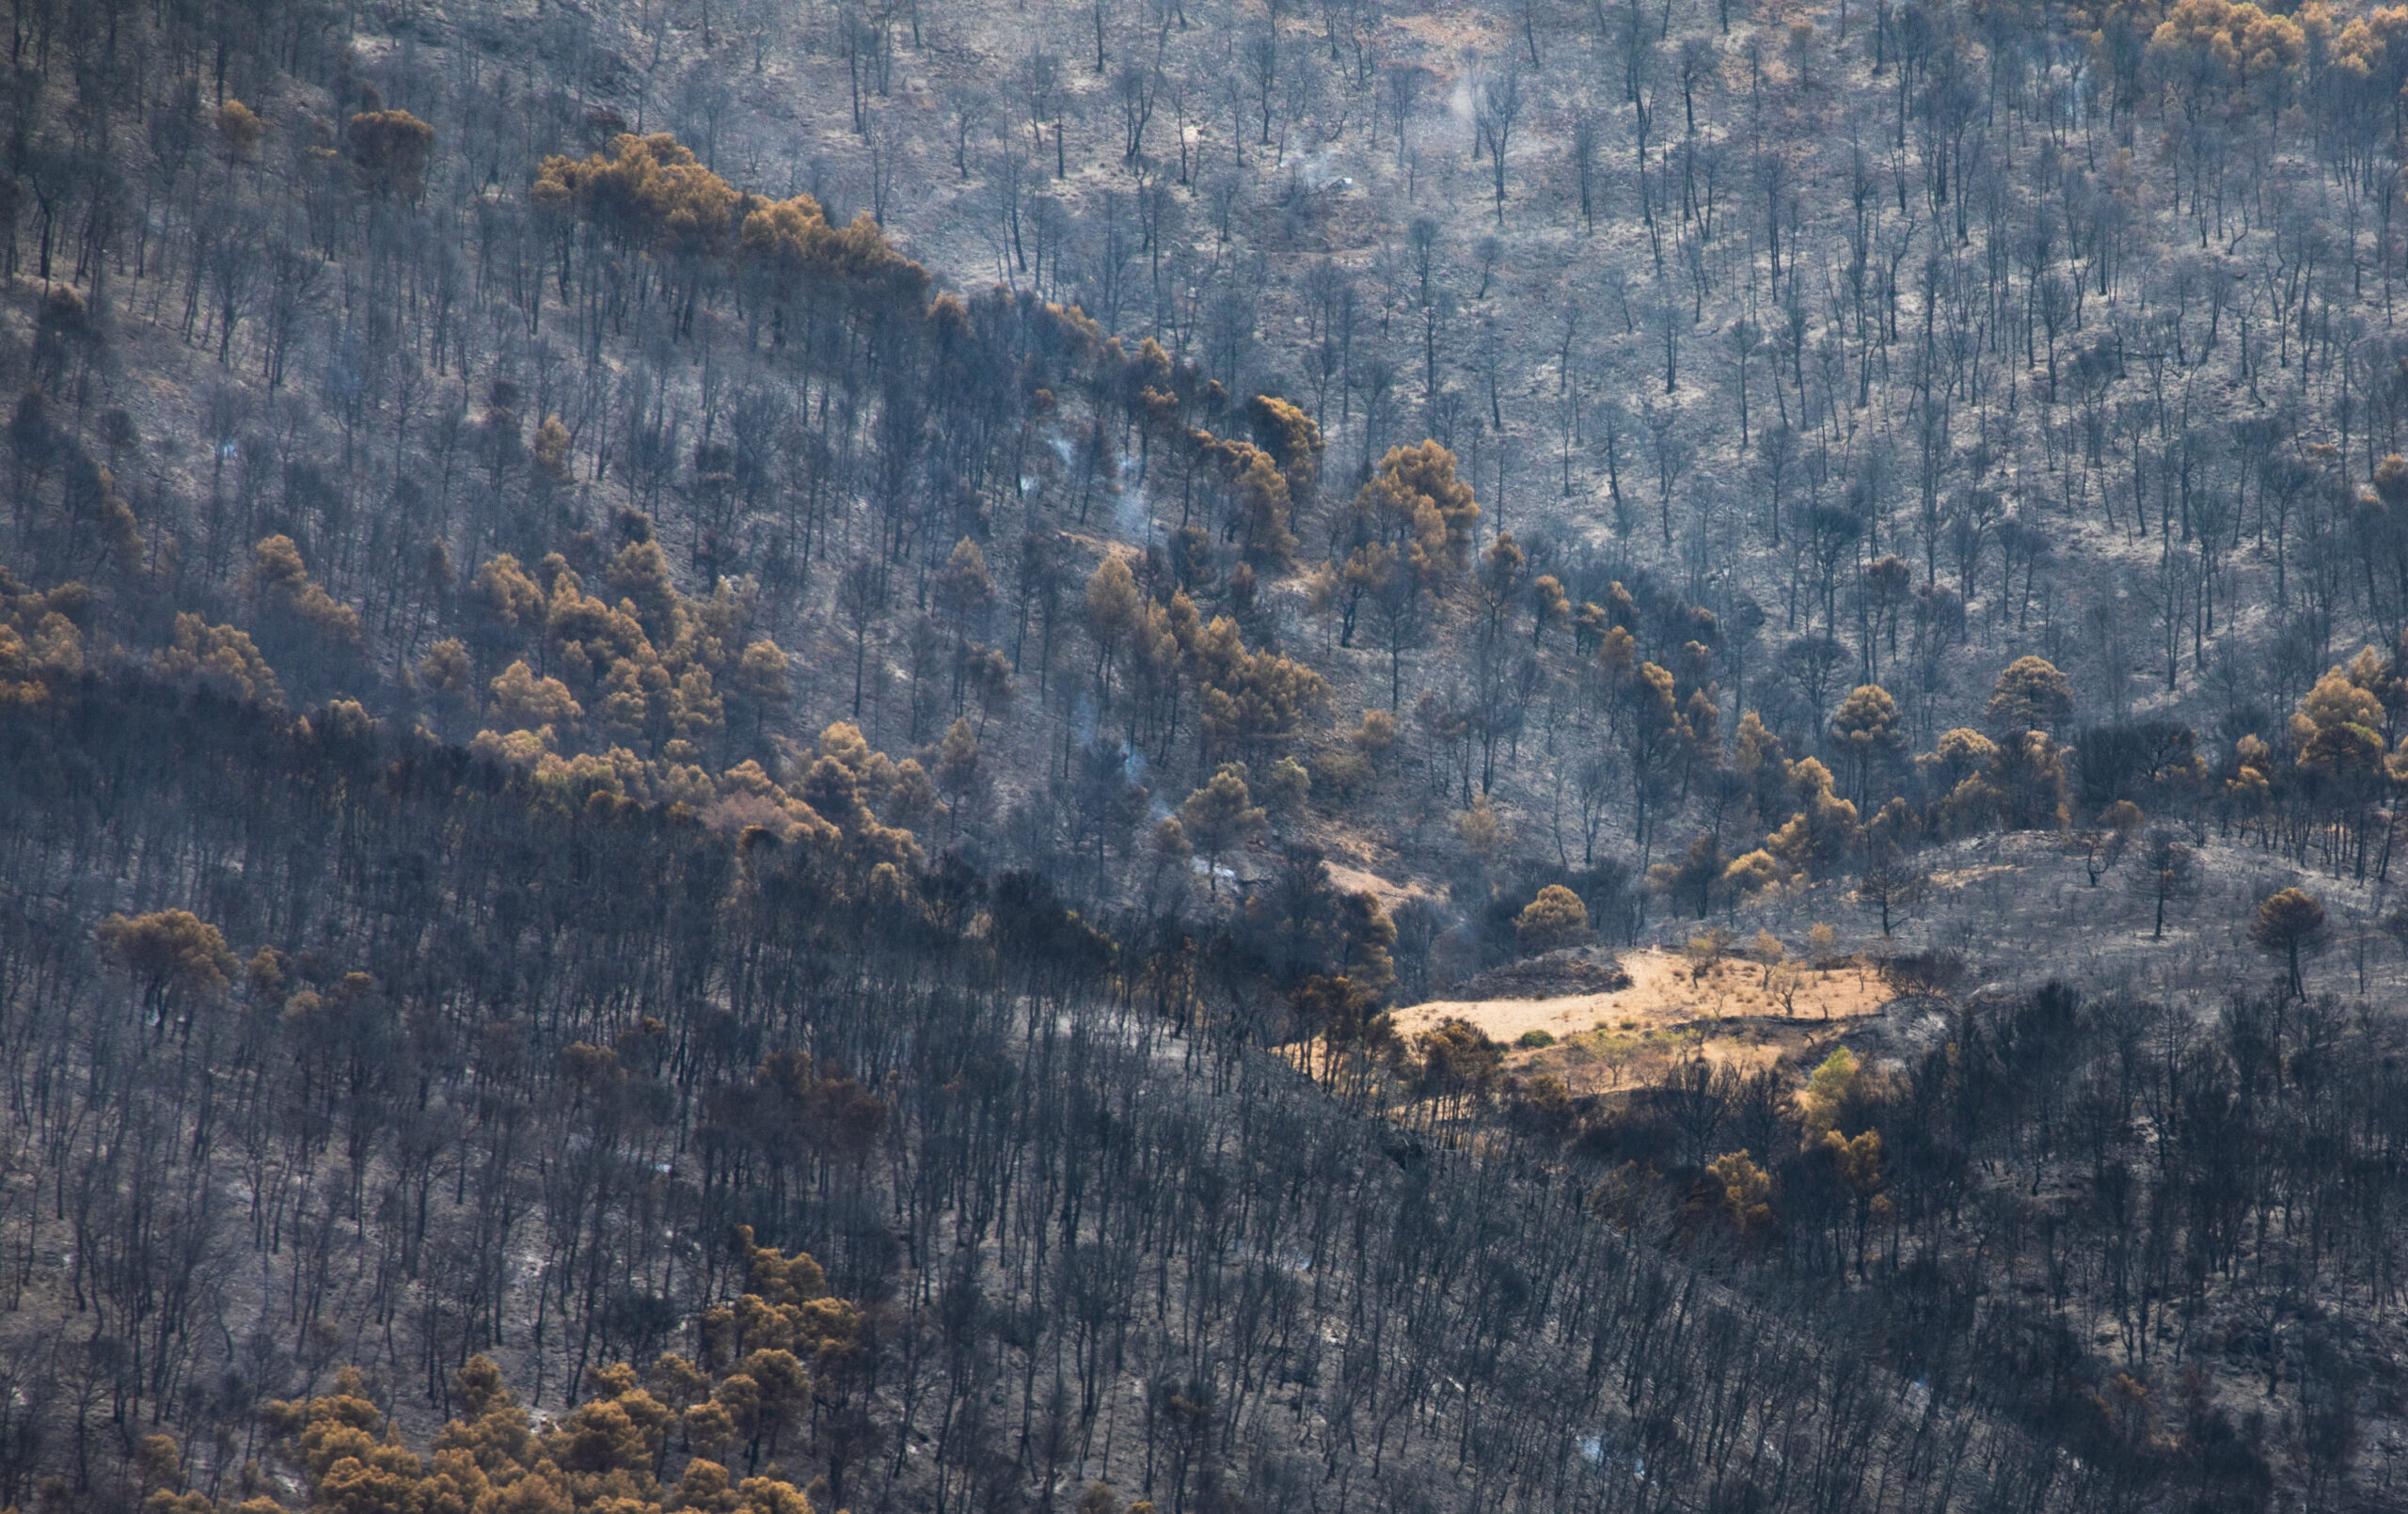
The Lecrin Valley Fire destroyed 3000 hectares of wild forest and cultivated land in the Lecrin Valley, Andalucia where I live. I must admit that finding myself in the middle of an actual natural disaster unfolding in real time added a discombobulating dollop of fear, uncertainty and confusion to my photographic process!
Trying to make sense of this event in images brought a new focus to some old practices, mainly in the area of shooting panoramas. Shooting multi-row panoramas allows immense detail and shows that detail in context in a way that simply cannot be achieved in single frames.

Techniques Used
The scale of these fires was so vast that individual photographs fail to convey the whole picture.
I shot a lot of single images and a couple of multi row panoramas. Usually I’ll use multiple exposures to capture the dynamic range of pretty much any scene in the spanish summer. Because of the smoke and haze this isn’t always necessary, so a lot of the single images I shot are single exposure with some processing to dehaze and breathe some life into the otherwise flat colouring in the frame.
Shooting Multirow Panoramas
This panorama is best viewed in full screen mode (last button on the right). It consists of three rows of seven overlapping images shot in portrait orientation and cropped after stitching to achieve the best composition. If you’re interested in the technical detail of panoramic photography, check out my guide to panoramic photography.
You can explore the panorama by dragging the cursor, zoom in for detail and out for context. Shooting multirow panoramas is a skill in itself, creating a result that goes beyond the capabilities of medium format and large format cameras with less of the expense and none of the limitations these larger formats bring with them. (Size, Weight, Portability)

Kit
Canon 5D Mk IV
Canon EF 24-70mm L lens
Kirk L Bracket
Feisol CT 3442 Tripod
Acratech Levelling Base (check out my review of the Levelling Base )
Acratech Pano Head
I use the Acratech Pano Head for shooting all my multirow panoramas now. It is very stable, supports a heavy camera and lens combo (up to 25 pounds) and is very precisely engineered. The camera can be manually rotated and tilted so the technique is to set the left hand side of the pano to 0 and rotate through a number of overlapping images to the right hand side of the pano. Then tilt up or down to get the next row, beginning at 0 again.
You’ll also need a rock steady tripod, without a centre column. I don’t care what the manufacturers claim, I haven’t come across a centre column that doesn’t introduce instability into the rig. Even a fraction of a millimetre movement will cause problems in stacking images. The longer the lens the worse the problem. This is why I bought the Feisol tripod and it doesn’t disappoint.
Back to the Acratech pano head. The horizontal plane is marked out in degrees on the pano head so try a test shot to determine how many degrees you need to rotate while leaving a 30% overlap between shots. This will depend to an on how far away your subject is and what lens you use. Do the same with the vertical axis and make a note of all your figures.
This technique will get you a set of images that are level and start and finish at the same place. Try doing this by eye, using a conventional ball head to appreciate the difference.
Be aware that if you need to have front to back focus and you have objects in the foreground, you’ll need to focus stack the images at the front of the shot, closest to the camera.
It’s clear that the shoot needs to be pretty rigorously planned in the sense that the top row with the sky is probably going to be single shots. Your bottom row will be made up of a series of stacked images that you’ll need to process separately in order to get the benefit of variable focus – sharp focus front to back.
This gives you a repeatable, dependable process that makes image gathering faster and more reliable.
Lessons Learned on the Shoot
Processing
There are many ways to process a multirow panorama. Both Lightroom and Photoshop have decent panorama stitching tools. I used Lightroom for the panorama above although I normally use PTGui Pro for complex panoramas.
A good process to follow is –

In the pre-processing stage concentrate on corrective processing only, e.g. lens correction, noise reduction etc. DXO Pure Raw is your friend here, if you don’t use that, make these adjustments in Lightroom. Leave the aesthetic alterations until after you have stitched the panorama.
Representing the Lecrin Valley Fire in Pictures

Representing the Lecrin Valley Fire in pictures was not straightforward. As the event unfolded in real time it was impossible to plan the coverage appropriately. Rather it was a case of reacting to events and trying to second guess the wind, the fire and the rain. A mugs game if ever there was one!
Planning
Planning shoots like this is very different to planning an ordinary landscape shoot, but one contains the other. You still have to take the photograph, know the area, plan to get there and all the rest of it. The difference is that many shoots go to waste as conditions turn out to be unsuitable, the fire goes somewhere else etc.
Keep an eye on the story, that will prevent you from straying too far off course.
What is the Story?
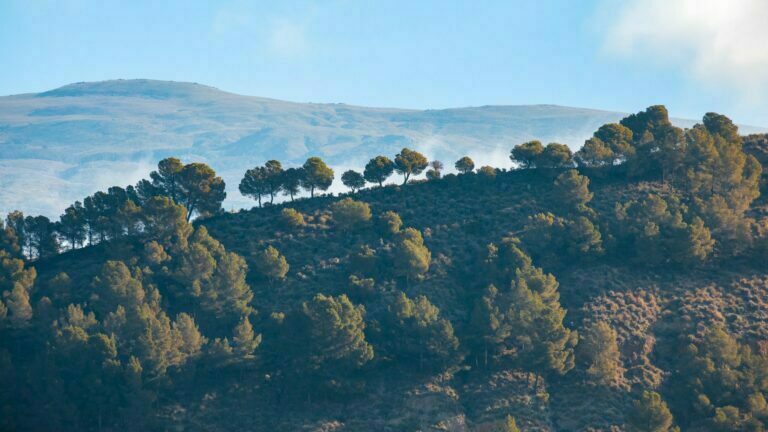
Initially the story seems to be about the destruction of 3000 hectares of largely natural forest in Andalucia. But there are many more strands, there will be a strand of regeneration – what will happen to this land? There are stories about the people displaced by the fire, the heroic efforts of the firefighters on the ground, the pilots ferrying water to the burning sites and the people supporting them.
As a landscape photographer, comparatively new to the area and not speaking Spanish fluently it seemed unlikely that I could get access to the firefighters at close range. So I elected to make my story about the landscape, the damage, the scale and the regeneration. That really governs my choice of shot.

Choosing the Platform
Where do people go that are interested in the Lecrin Valley fire? Facebook largely, Twitter to a lesser extent. So the smaller pictures could be easily distributed, but as the audience was large and highly engaged, some care has to be taken with timing so as not to give the wrong impression. For example posting a picture of the valley in flames a day after the area had been declared stable would cause panic for some, irritation for others! The panoramas less so, as the audience has to make a deliberate action to access them. The challenge is to make gigapixel panoramas as consumable as possible on phones, tablets and desktop computers..
This means hosting the output form Pano2VR on a suitable platform. I choose to use Amazon S3 storage because it is cheap and effective. It’s perfect for panoramas because it doesn’t charge based on inodes. So the thousands of small tiles making up the full panorama are not individually charged.
Future Development
It feels to early to plan future development beyond this week, but if the project includes regeneration then there will be plenty of opportunity further down the line.
For now, I’m going to focus on some really big scale panoramas that enable the level of detail in the pictures here, wit the context of the panorama featured in this article. That should keep me busy and productive in the near term!
Subscribe…
I’ll keep you in the loop with regular monthly updates on Workshops, Courses, Guides & Reviews.
Sign up here and get special prices on all courses and photowalks in 2026
I sometimes use affiliate links in our reviews and instructional material. If you purchase software or hardware through one of these links it won’t cost you any more, but it does help me to offset the costs of creating the content.
Thanks for your support!


One Comment