Printing like a Pro
This article explains how to approach printing like a pro in DxO PhotoLab 7, using the Soft Proofing tools.
In truth, printing has long been a tortuous task for me, I believe that printers and photographers are different beasts and rarely are the two skills combined. There’s always Ansel Adams to disprove this theory, but I find it hard work.
Video
Table of Contents
The Problem
The key to printing like a pro is not to try and second guess the printer, but to use the scientific method brought to us by Soft Proofing Tools, correctly.
The first thing to mention is that straight out of the gate, a print will look different to the image you see onscreen for two reasons.
- Your Screen is not Calibrated
- Paper is not backlit
The first of these cases will be the subject of a different article in the near future. What happens is the calibration of computer screens drifts, eventually some way away from where it started and you need to recalibrate, preferably every couple of months and definitely before you try and produce a proof ready for print.
I use DataColor – Spyder X Elite to manage my screens and I’m very happy with it. I also hear good things about ColorMunki or Calibrite as they are now known.
The second case is that the paper is not backlit. Screens have been developed to produce contrasty, crisp displays at fantastic resolution. Paper naturally produces a softer picture, partly because ink diffuses slightly on paper and partly because the number of colours supported by printers is typically less than the number in the Adobe RGB or HDR space or DxO Wide Gamut Color Space. The printer driver or software driving the driver swaps in the next best color for these out of gamut tones.
Soft Proofing
I’ve been using an exported tif file as the master copy, but you can also use the original Master. You’ll need to set up the Compare buttons to take advantage of this.
First make a Virtual Copy of your master image and open that copy in the Customise module.
There are two buttons above the image in PhotoLab, one called Compare and the other is Split Screen Compare. The Split screen compare has a drop down menu in which you can set the “Before” image to the original master. PhotoLab will list the Master by filename (M).

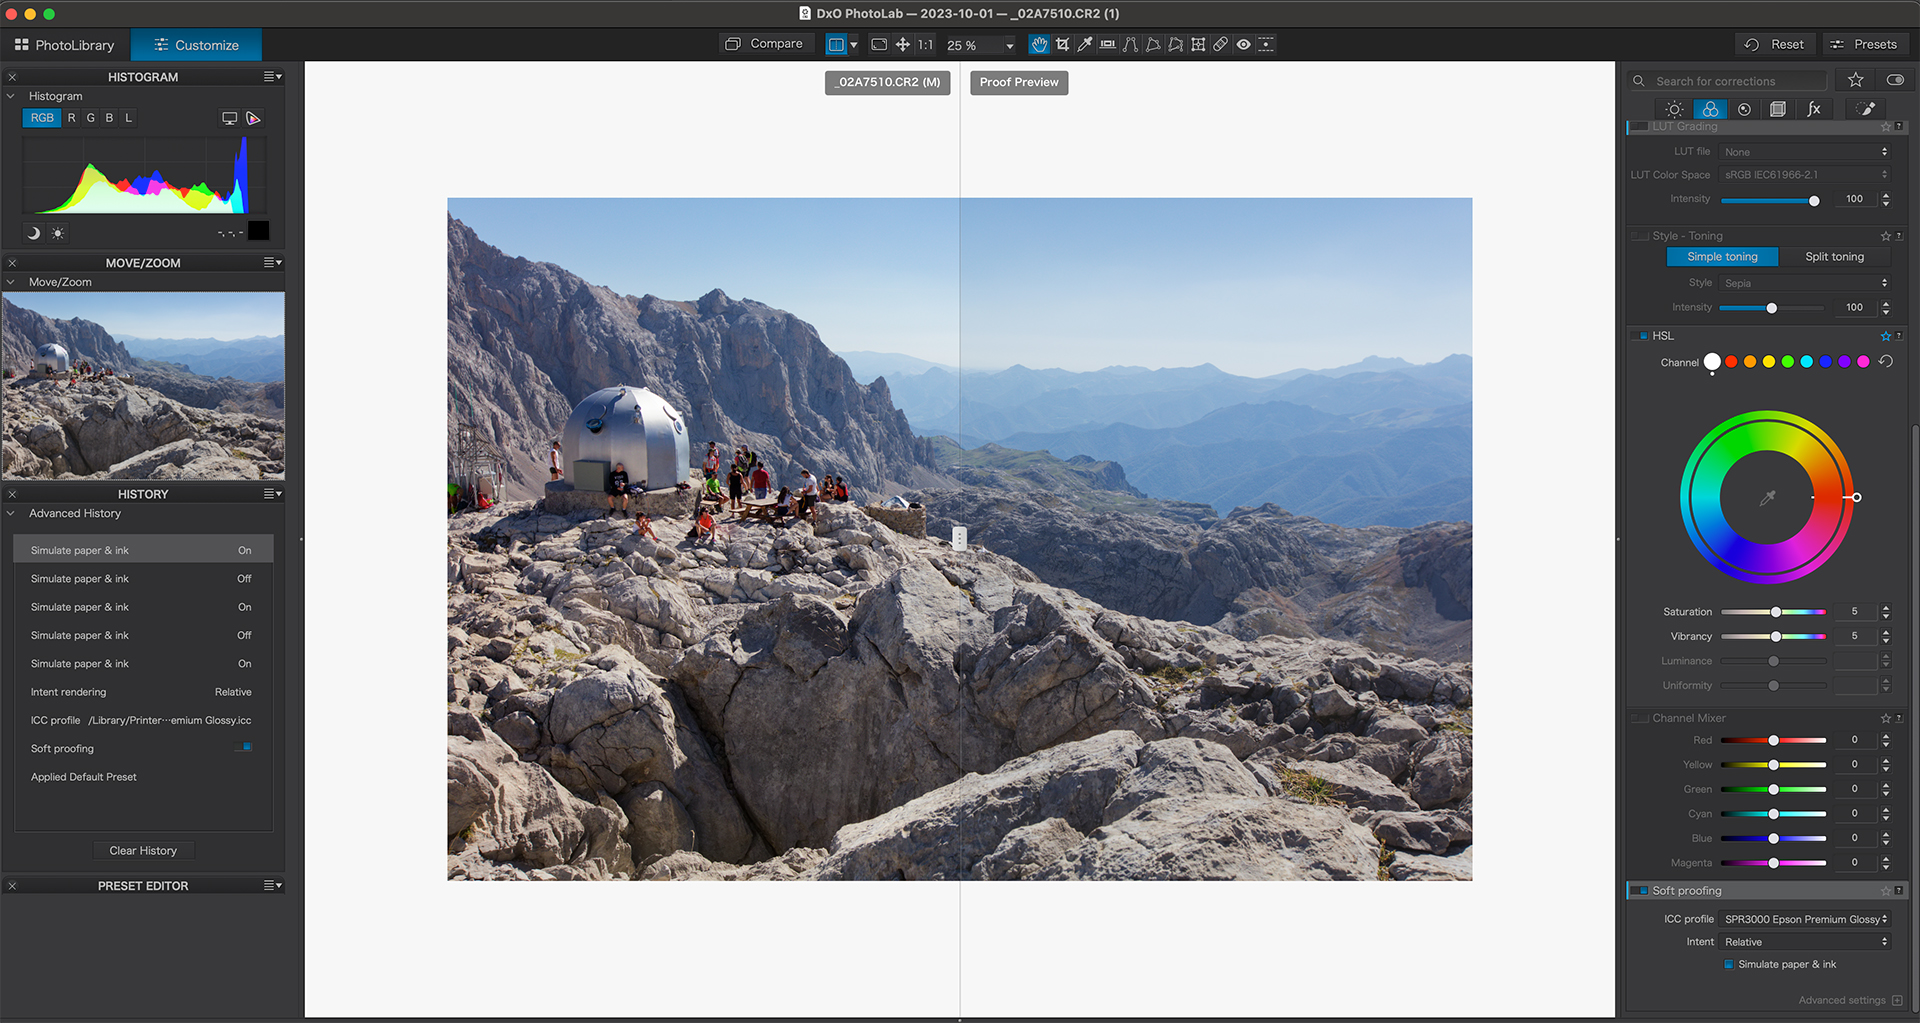
Go to the Color Palette and scroll all the way to the bottom where you will find the Soft Proofing Tool.
You’ll want to see the image against a white background as that will mirror a printed and framed image. Color look different against black to the way they look against white.
ICC Profile
In the soft Proofing controls go to ICC Profile and set it to the profile matching the paper you are using. Different papers have different characteristics so it’s important to match the physical paper with the profile you choose. The generic profiles will have been installed on your system when you installed the printer software. Specialist paper manufactures like Hahnemühle provide their own ICC files aligned to various printers. It’s important to get the right one as the print is produced by a combination of paper and printer.
When the ICC profile is applied you’ll see a very slight change in the image on the proof screen. This is caused by the software deciding what colours are in and out of gamut and substituting similar colours for those that are out.
DxO PhotoLab 7 has a useful tool at top right of the histogram that switches on a warning about out of gamut colours. This displays as red highlights in the soft proof image, similar to the highlights warning.
Perceptual and Relative Rendering
Perceptual rendering or intent is the result of software trying to make the image as good as it can be. Similar to a preset. Relative Rendering is simply concerned with unprintable colours. I prefer to use Relative Rendering as it gives me more control over the image, but if Perceptual rendering looks good then go with that. The important thing is this setting is reproduced in the Print settings later and needs to be the same in both locations.
I use the split screen compare to assess the tweaks I need to make in the contrast, color and so on.
Simulate Paper and Ink
Tick this box to pick up the rest of the changes that may be needed between original and proof. Often this is pretty simple, slight differences in contrast and tone. My experience is the soft proof image will look slightly darker, this is a mid tones adjustment, and less contrasty.
Once you are happy the two images look the same, turn off the soft proofing tool. Don’t panic, the picture will be brighter and quite different from the one you processed, but you are sending this version to the printer and in principle you’ll find that the adjustments you made in the previous steps, compensate for the unwanted characteristics of ink and paper.
Check Page Setup
Go to the File menu and check the page setup matches your intention – Printer selection, page size and orientation. Leave scale set to 100%
Go to Print in the File menu.

Check the Printer matches the printer you are going to use and choose the most obvious option from the Preset menu – we’ll save your settings as a new preset later on so you don’t have to do this every time.
In DxO Color and Sharpness make sure the color profile is set to managed by DxO PhotoLab and that the Intent matches the one you used in Soft Proofing.
Sharpness defaults to 50% and this has always worked for me. I don’t use any other software for sharpening but if I did, I might set this slider to 0%
In DxO Image Settings – just check the values for contradictions.
in DxO Layout – I always create a border around my print so I have spare paper to overlap the cutout in the mounting stage.
Page Attributes should match the values in Page Setup.
Printer Options

Color Matching should be set to ColorSync with an automatic profile. We’re letting PhotoLab handle this so automatic is arguably better than a specific value. It leaves less to chance and to be honest I’m not sire which setting has precedence – I suspect it is this one.
Check your Print Settings – these should all match settings we’ve already discussed.
Media Type should match that set in the Soft Proofing stage.
Color should be set to Color but Color Settings should be turned off – these are printer settings and we’re managing Color through DxO PhotoLab, not the printer.
High Speed should be turned off.
Return to the top of the panel and in the Presets option choose Save Current Options as Preset
You’ll need to make a new preset for each different paper you use and again if you buy a new printer.
Now press Print!
Printing Like a Pro – Conclusion
The art of letting software second guess the printer using science!
In printing, the variables are the paper and the ink. If you’re printing from PhotoLab, you can let the software manage the printer driver and make the adjustments you need to compensate for the tonal differences between screen and paper.
Subscribe…
I’ll keep you in the loop with regular monthly updates on Workshops, Courses, Guides & Reviews.
Sign up here and get special prices on all courses and photowalks in 2024
I sometimes use affiliate links in our reviews and instructional material. If you purchase software or hardware through one of these links it won’t cost you any more, but it does help me to offset the costs of creating the content.
Thanks for your support!


