Ultimate Guide to Milky Way Photography
In this guide to Milky Way photography, I’m going to explain how you can create good, clear, well-defined photographs of the Milky Way with a DSLR or Mirrorless Camera, a wide angle lens, image stacking software and Adobe Photoshop.
Table of Contents
Introduction
The aim of this guide is to demonstrate how to produce great pictures of the Milky Way using your existing equipment with minimal extra expense. All of the pictures in this article were shot using this method. It works and it is repeatable.
One of the features of Milky Way Photography is that it takes place in the dark. When it comes to composition, this is something you need to set up in advance. Check out the location, access to the precise point where you’ll place your tripod, including trip hazards, and the expected position of the Milky Way. Your life will be so much easier and your photographs so much better!
Scouting Locations
I usually think I’ve got a pretty good sense of direction, but the point about photographing the Milky Way is that it is present at a fixed point in the sky. Most of the time I find my estimate is off; consequently, I’ve found locations that seemed ideal and don’t work and locations that I may have passed over, that work well.
So, the composition needs to be pre-planned more than most. You need to know where the Milky Way is relative to your location before you go out for the final shoot. Staggering around in the dark trying to make a composition is not the way to go.
Instead, use a combination of online tools to scout potential locations and then visit and photograph in daylight to refine the composition. I usually photography in landscape and portrait orientations, to help me decide which will work better in the shoot.

I use a combination of apps, the essential (to me) PhotoPills, The Photographers Ephemeris and Sky Guide, an AR app that helps you to visualise where the Milky Way will be at any time and date. So typically, I will visit the location, find an interesting foreground and use Sky Guide to tell me where the Milky Way is relative to the foreground at any time.

Perfect Conditions
The more light you have in the atmosphere, the harder it is to see, let alone photograph, the Milky Way. Light pollution from towns and cities is to be avoided, and you’ll need a clear night sky. The moon also throws light into the atmosphere, so best conditions are found on clear nights, away from cities with, at maximum, a new moon.
To make a photograph we need more light, not less, so we achieve this by manipulating the settings on our camera.
Exposure vs. ISO
Stars are tiny dots of light in a photograph, when it comes to capturing the night sky, one thing very quickly becomes clear, introducing noise into the image by using very high ISO is not going to help as the noise reduction algorithms will also remove at least some of the stars from the image. This might not be a bad thing, but you want to remain in control, so don’t rely on noise reduction to make any aesthetic decisions. If your camera has a noise reduction setting, turn it off.
It’s worth noting that modern sensor design is much better at tolerating noise. ISO invariant cameras like Nikon will not introduce extra noise into an image as the exposure is cranked up after the shot. Canon cameras are mostly ISO variant which means some noise will be introduced. If you shoot Canon, it’s more important to get the shot right to begin with.
Regardless of ISO, Long exposure and wide open aperture is the better way to go. You’ll end up with well-defined foregrounds and sharper stars as long as you don’t expose for long enough for the earth’s rotation to blur the stars.
How Long Should I Expose for?
Modern cameras and even iPhones are perfectly able to take decent photographs of the night sky, You simply need to juggle ISO, Aperture and Shutter Speed without introducing excessive noise. The Earth is a part of the Milky Way, but given that the centre of the Milky Way is 26,000 light years away from earth, depth of field is of little consequence so I’d recommend a wide open aperture of f/2.4 or f/4 depending on the lens you are using and an ISO of between 1000-3200 depending how well the camera is picking up the stars.
Fix a length of exposure that works for the conditions you are shooting in. Using my 16-35mm lens I’ll shoot no longer than 13 seconds on the Canon 5Ds for fear of introducing star trails.
500 Rule
The 500-Rule states that to obtain a clear image of stars without trails, take the number 500 and divided it by your focal length to get your exposure time. For example, a 16 mm lens would call for an exposure of about 31 seconds and capture the stars without trails.
Sadly, because it is such an easy equation, with modern cameras this rule simply doesn’t work because you can see much more detail in the picture to begin with. Movement in the shape of elongated stars is much more obvious. You might have more success dividing by 30 or less.
NPF Rule
Obviously to match the complexity of modern cameras we need a much more complicated rule! How about this one, developed by Frédéric Michaud ?
(35 x aperture + 30 x pixel pitch) ÷ focal length = shutter speed in seconds..
Fortunately we have camera apps to do this kind of calculation for us. I recommend PhotoPills, the Swiss army knife of landscape photography. The Spot Stars section gives you both NPF and 500 Rules.
Removing Noise by PhotoStacking
One method of removing noise from an image is to shoot multiple images and stack them together. The stacking software will drop points of light that don’t appear in the majority of the images, thus keeping the stars and dropping the noise.
Lightroom and Photoshop can both handle Stacking, but for wide-angle Milky Way photography I prefer to use an app called Starry Landscape Tracker which is fine tuned specifically for star photography.
Starry Landscape Tracker
Starry Landscape Tracker is an app for the Mac platform, designed by Ralph Hill. It is designed to composite sequences of images taken one after the other from the same position, with relatively short exposures. (<20 seconds).
There is another app by the same person called Starry Sky Tracker that is similar, but designed for deep space photography.
For anyone using Windows, I’m told that Sequator is pretty much as good and has the benefit of being free!

Shooting the Heavens
Shooting with a DSLR/Mirrorless Camera
You’ll need a very steady tripod. I favour Feisol tripods without a centre column as they are stable and the lack of the centre column removes the most obvious source of movement from the platform.
Get your focus as sharp as possible, manually. Fire off a sequence of around twenty images.
I prefer to shoot my foreground separately to make it as sharp as possible, then focus on the sky from a position that has less foreground. Once the processing has been completed, drop the sharp foreground onto the sharp stars in Photoshop.
A Workflow for Processing
Processing in Lightroom/Camera RAW
Carry out basic processing on the first image and then sync the settings across the entire set so that they are all exactly the same. Typically this will involve lifting the exposure, reducing the highlights and increasing saturation and vibrance so that you can see the colours. Your goal here is to make it easy for the stacking software to do its job.
Stacking in Starry Landscape Tracker
Import the twenty picture sequence into Starry Landscape Tracker.
The software will analyse the picture and place red dots all over the sky. You need to erase any of these dots appearing on the land and tidy up the sky, creating more red dots in any areas that have been missed. Then generate a mask for the compositing.
Export the finished tiff.

Processing in Photoshop
Open the tiff you just generated and start processing in Photoshop. Depending on the location and conditions you shot in, this will always be different, but the goal is to make the Milky Way stand out without looking too artificial.
You should aim to
- Remove distracting stars
- Apply Contrast in the area of the Milky Way
- Create a ‘glow’ around the Milky Way (Orton Effect)
Remove Distracting Stars
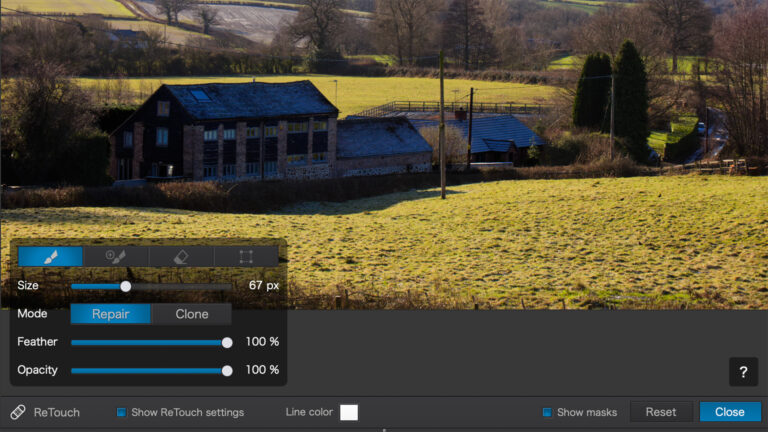
I recommend removing some of the distracting stars – this can be done with Photoshop’s targeted noise removal tools.
Filter -> Noise -> Dust & Scratches.
Set the radius to 2 or 3 pixels and the threshold to around 24. Anything less than two pixels will not make much difference; anything larger than 3 will remove too much, but it is a matter of taste. The threshold affects the level of detail left in the image. I recommend zooming in to see how this looks. You need to balance simplification with preserving detail.
You can also use
Filter -> Noise -> Median
to achieve a similar effect. I’ve found Median to produce slightly better results.
Add Contrast to the Milky Way
Use curves and masks to introduce some contrast and definition into the Milky Way itself, Use the curves layer to emphasise the darks and lights in the Milky Way itself and a mask to make sure the effect is confined to the Milky Way. Paint it in and adjust the opacity if needed.
The Orton Effect
The Orton effect introduces a soft glow into the image. This can be achieved in Photoshop, but I use the Glamour Glow effect in Nik Color Efex Pro, then use a mask to restrict the effect to the Milky Way itself.
Lastly a little Dodging and Burning to emphasise the light and shade within the Milky Way and apply some Gaussian Blur to make the whole effect more subtle and lifelike.
Nik Color Efex Pro

Nik Color Efex Pro is one element of the Nik Collection. It is an excellent complement for Photoshop. It probably doesn’t offer much that can’t be achieved in Photoshop with some complexity, but it is quick and well integrated with Photoshop, so it can be applied as a layer, with all the control that implies, for example, if the effect is too strong, use opacity to back it off.
Longer Exposures with iOptron SkyTracker
A step up for astrophotographers is to use a sky tracker to counter the earth’s rotation, effectively keeping the stars still in the frame. This method is good for Milky Way photography and better for deep space photography.
I use the iOptron SkyTracker; it works well, but on the minus side, it is heavy and if you need to use a counterbalance to offset a long lens, prohibitively heavy. I will create a tutorial for this device presently, but in essence it provides a platform between the tripod and the ball head supporting the camera that locks onto Polaris, the North Star.
The ball head supporting the camera is attached to a base that rotates against the direction and speed of the earth’s rotation, enabling the photographer to point the camera anywhere they like; the effect of the earth’s rotation will be negated so very sharp photographs can be taken with longer exposures.
The heavier the camera, the more unstable the platform, and because the rotating head is driven by a motor, you need to seriously consider using a tripod without a centre column to reduce unwanted camera vibration.
Conclusion
I’ve demonstrated how to take great pictures of the Milky Way using a DSLR or Mirrorless camera. If you’re interested in deep-space photography, this method will not be satisfactory as you’ll be more concerned with the detail. Your image will need to be more immersive, so more precise and sharper. You may also choose to invest in kit!
Subscribe…
I’ll keep you in the loop with regular monthly updates on Workshops, Courses, Guides & Reviews.
Sign up here and get special prices on all courses and photowalks in 2026
I sometimes use affiliate links in our reviews and instructional material. If you purchase software or hardware through one of these links it won’t cost you any more, but it does help me to offset the costs of creating the content.
Thanks for your support!