DxO PhotoLab 6 Review
N.B. PhotoLab 7 is now available. If you’re interested in the new features, please read my DxO PhotoLab 7 review.
I’ve been part of the beta testing team for DxO for a few years now so I’ve had a chance to see this product evolve close up. Its been a fascinating and rewarding experience.
Released today, in this DxO PhotoLab 6 Review we compare capabilities in editing and catalog management with previous models of PhotoLab and with Lightroom. The Photograph at the top of this article was processed today in PhotoLab 6.
We’re going to step through the processing.

The Challenge for DxO
DxO are differentiated from all other vendors by their vast database of lens and body characteristics and their ability to provide corrections for lens/body combinations. This database comes from their sister company, DxOMark whose business is testing lenses, and provides the industry benchmark for manufacturers.
Taking Adobe as the target, and Luminar, ON1 and Capture One as the competition, on RAW processing I think DxO PhotoLab 6 comes out better than anyone. However Adobe have the market covered by the sheer breadth of their portfolio so for Luminar, ON1, Capture One and DxO the challenge is to extend the capability of the product while maintaining compatibility with Adobe.
DxO have addressed this challenge by creating a smooth import/export workflow into the Adobe family – so I can for example keep my photo library in Lightroom, export to PhotoLab for Raw processing and save it seamlessly back into my library. This makes it easy to choose PhotoLab.
PhotoLibrary
The PhotoLibrary has been the achilles heel for PhotoLab for quite a while now, it has been improved incrementally and PhotoLab 5 made a breakthrough in making metadata fields compatible with Adobe Lightroom. So what has improved in DxO PhotoLab 6?
Building on its simple but powerful PhotoLibrary system, DxO PhotoLab 6 extends its range of Exif and IPTC tags, adds nesting for Projects, and introduces color labels for easier organization and management of files
DxO Labs
The fundamental difference between PhotoLab and Lightroom is that the Lightroom catalogue ingests your photos and arranges them in date ordered directories under the catalogue directory. The PhotoLab library module is independent of the raw images. It simply builds an index of whatever directory you point it at.
These improvements in the tagging capability and usability bring the Library module closer to being perceived as a photo management application and therefore closer to being perceived as a serious rival to Lightroom.
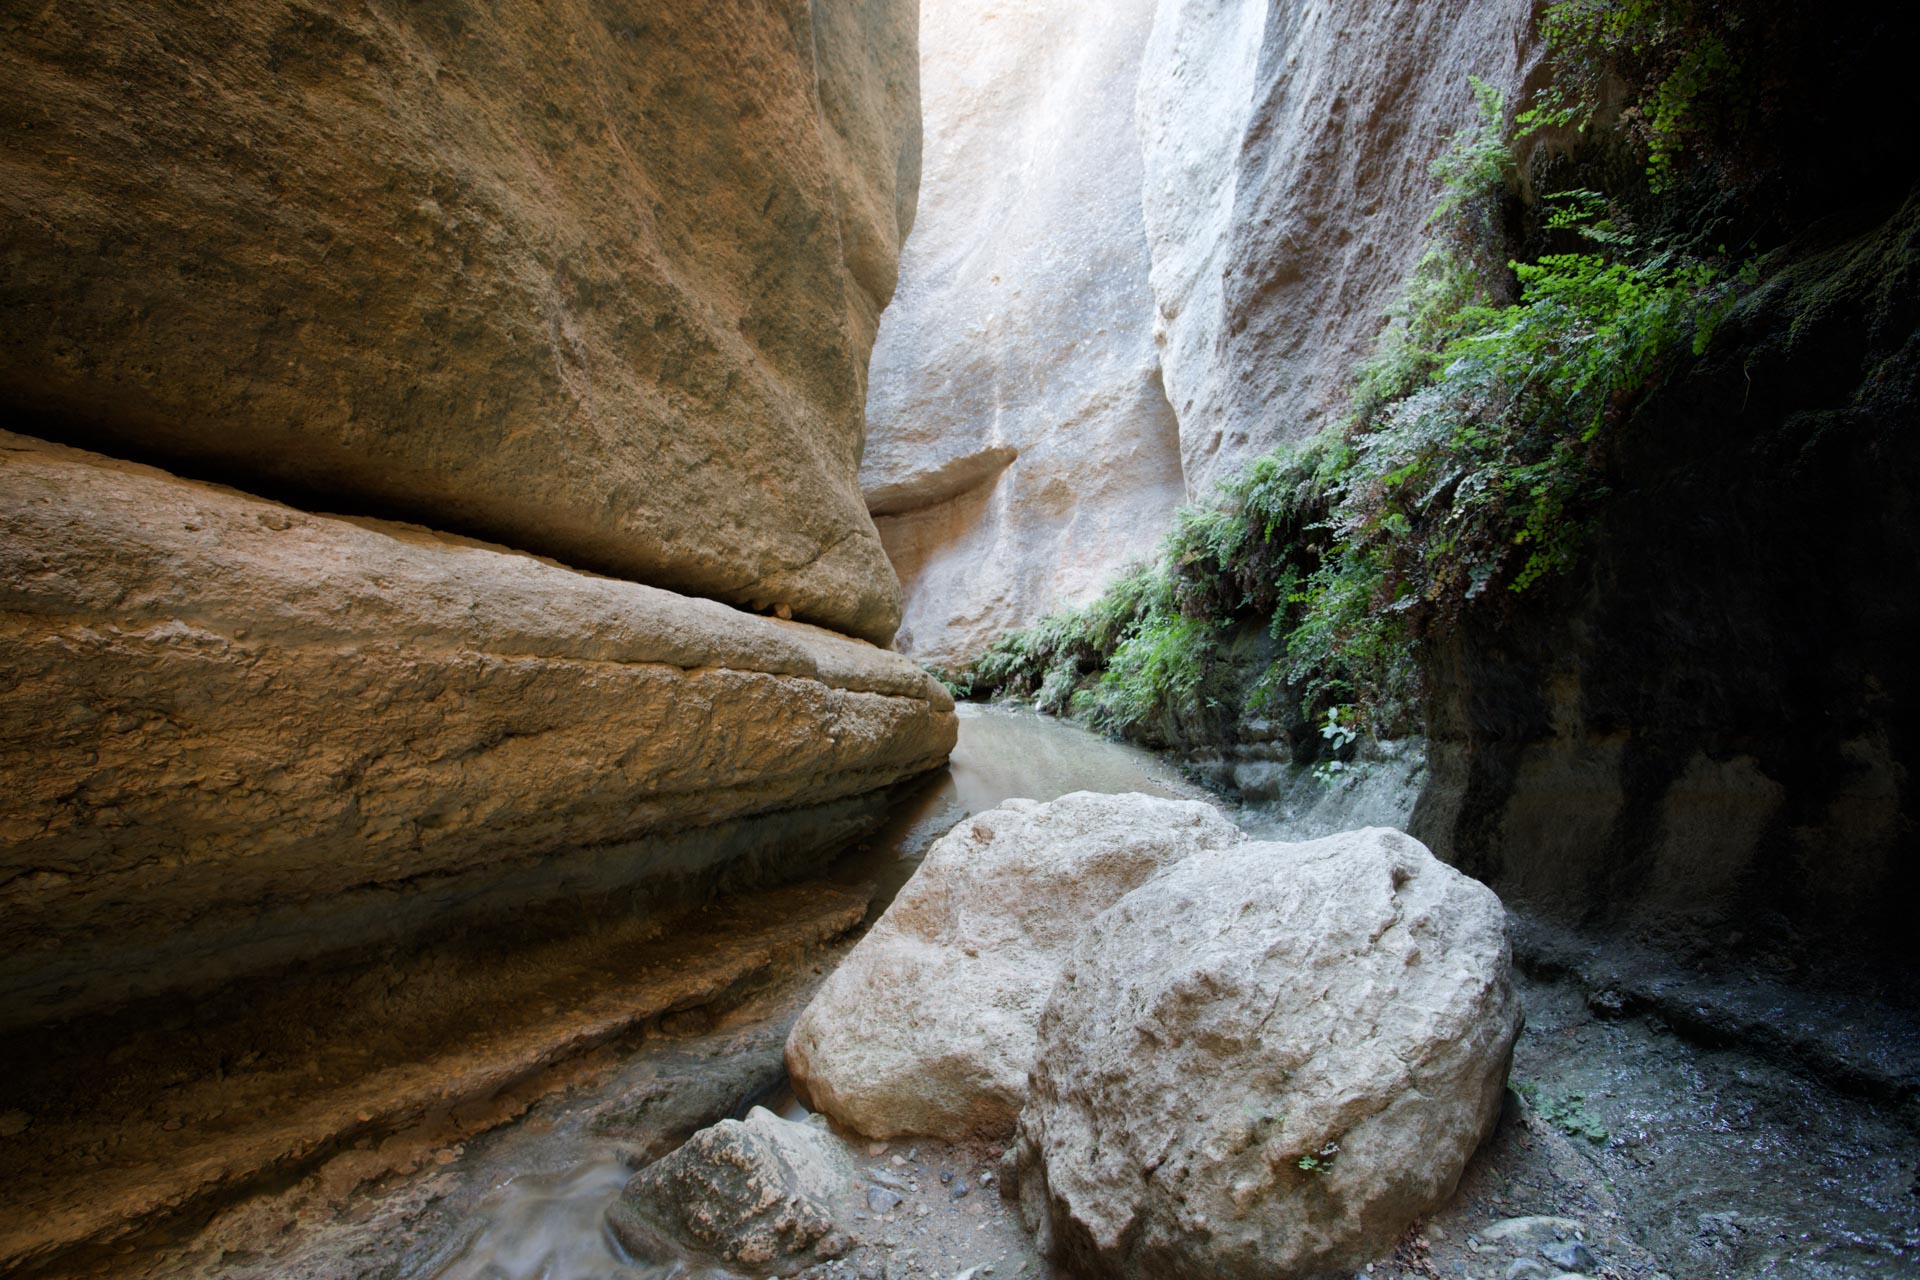
I’ve selected a fairly dingy RAW file that was a 16 second exposure in a dark canyon near Saleres. Because I use Lightroom, I’m going to process my image from the stage of exporting to DxO PhotoLab 6.
Deep Prime XD (eXtreme Details)
This is new. Already excellent noise reduction taken a step further.
DeepPRIME XD uses a neural network trained using billions of image samples and routinely gives photographers improvements of more than 2.5 stops. For example, an image shot at 4000 ISO will more closely resemble an image captured at 500 ISO in terms of noise, color, and clarity. And because it is fundamental to the RAW conversion process, DeepPRIME XD can even increase dynamic range, providing photographers with greater flexibility when shooting in low-light situations. The original DeepPRIME mode is also still on board for faster enhancements or for images that simply need less adjustment.
DxO Labs


Before doing any other processing I applied DeepPrimeXD to the RAW image in DxO PhotoLab 6. I wanted to see how much difference it makes in isolation. The original image has no blown highlights and no impenetrable blacks, the detail is there to be retrieved and if you look at the slightly overexposed rocks in top centre, you can see the improvement clearly.
As in previous versions, the preview window is the only way to view the effect of the correction until you export. This is perhaps the only way to deal with processor intensive task of applying this technology. The processing of the full sized RAW file took nearly 10 minutes on my Mac Mini. Note that there is a setting in the PL6 Advanced Preferences to enable the GPU on your computer. That should dramatically accelerate the process.
Comparing the two pictures there is a lot more detail in the highlights after Deep Prime XD has been applied.
Lens and Camera Profiles
Core to DxO PhotoLab 6 are DxO’s pioneering Optics Modules. Almost 20 years ago, DxO patented the concept of lens corrections and since then, the analyses performed in its purpose-built laboratory have set the standard for the digital photo editing industry. The quality and precision of DxO’s Optics Modules remain unmatched by its competitors, partly because lenses and cameras are tested in combination, giving photographers profiles that are tailored specifically to their equipment. With all the latest modules automatically downloaded to DxO PhotoLab 6, you’ll be assured of the best quality results every time.
DxO Labs
It’s been a criticism of DxO that they don’t support certain cameras the moment they come out. They have now published a definitive list of supported cameras and lenses that is updated regularly. If you’re in doubt about your camera, consult the list!
Better news is that the modules are now synchronised across the entire DxO Software suite meaning that you can apply these lens correction in ViewPoint or FilmPack too.
Optical Corrections
Compare the before and after with Optical Corrections applied.
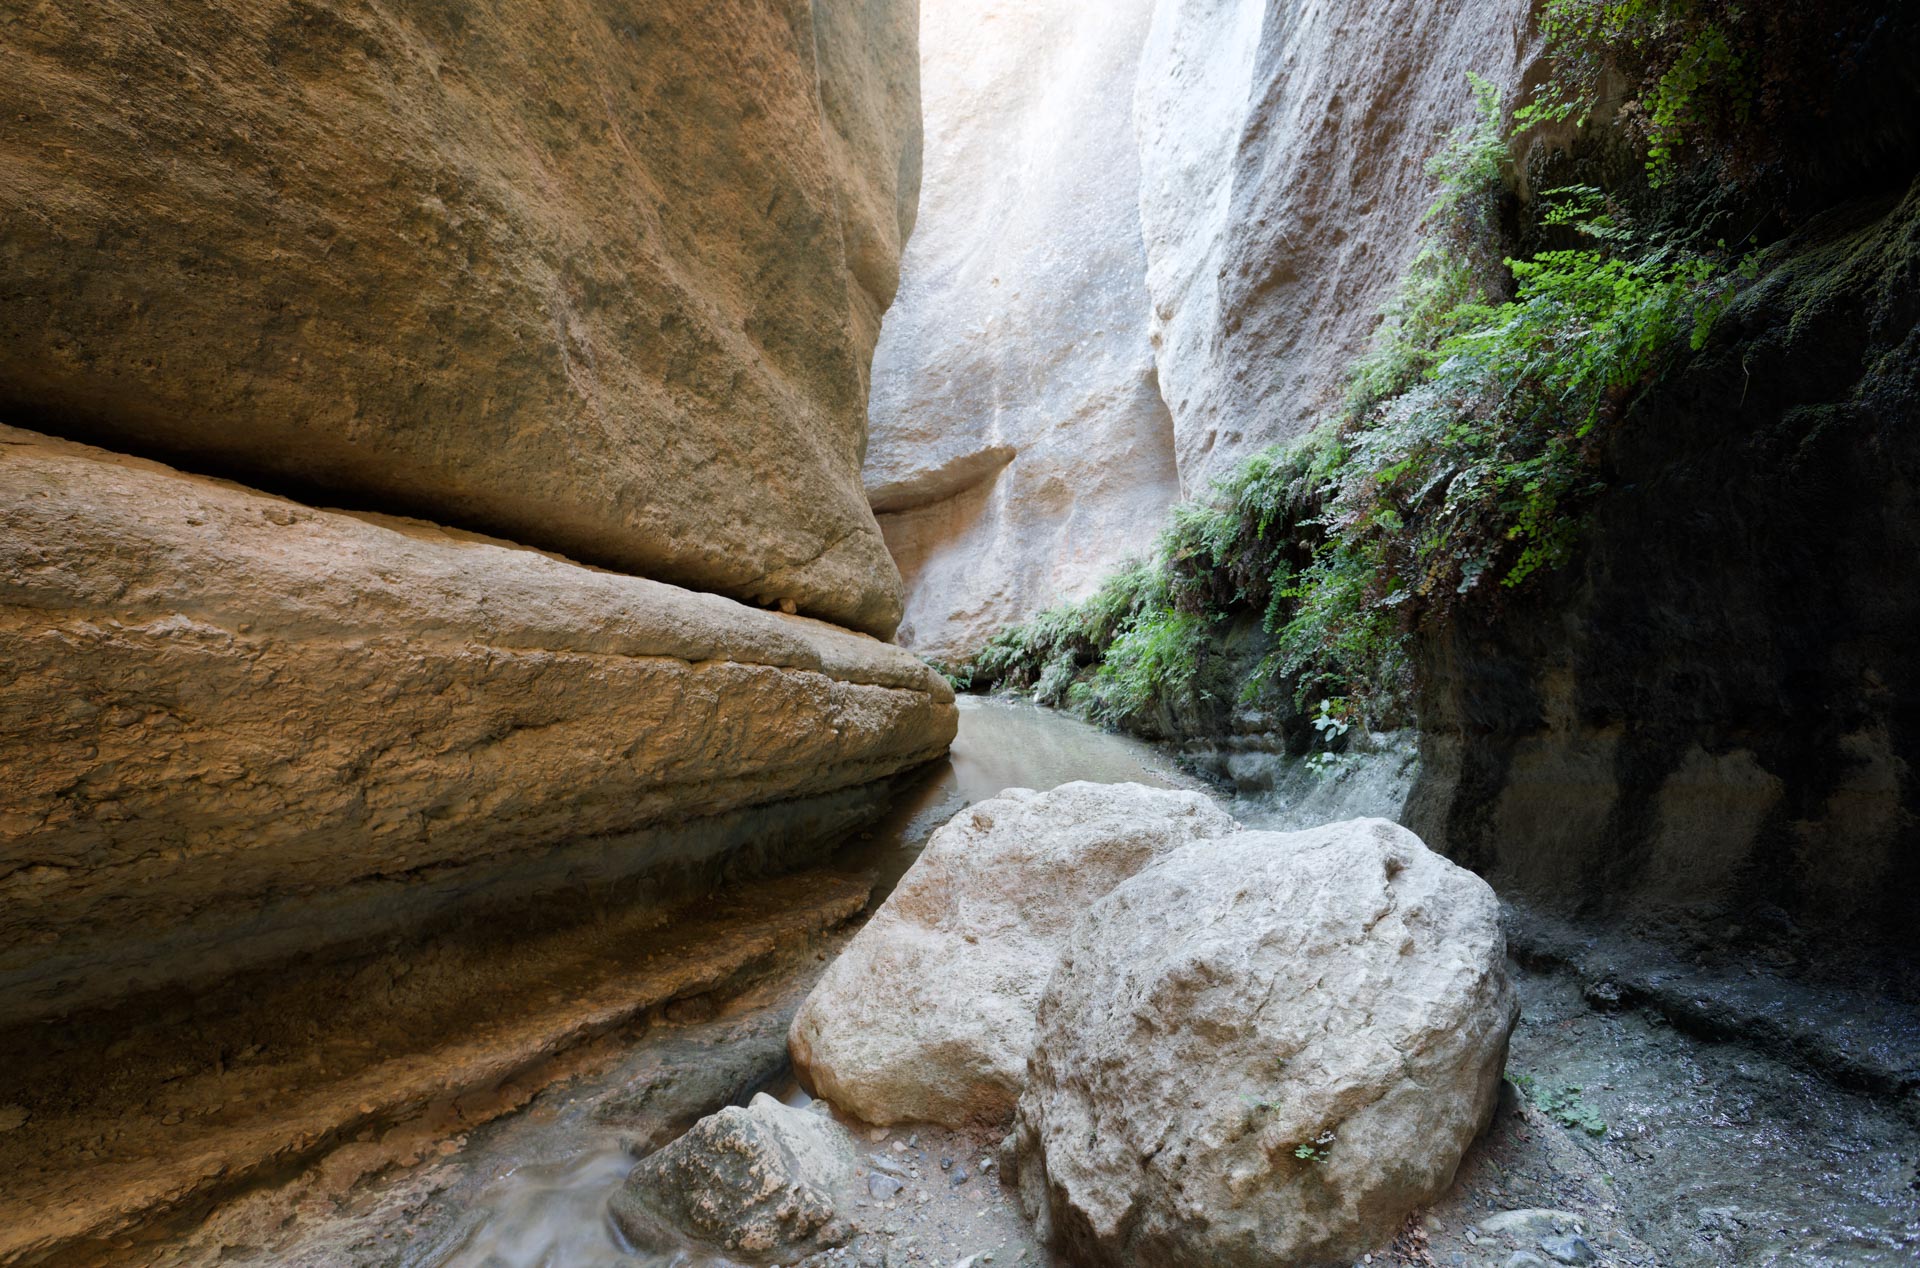
You can set PhotoLab up to apply optical corrections on import by default. Or you can choose to apply them yourself from the presets menu on top right.
The “After” image applied optical corrections for the Canon 5D Mk IV / Canon EOS 17-40mm L lens combination. You can see that some of the wide angle lens distortion has been removed.
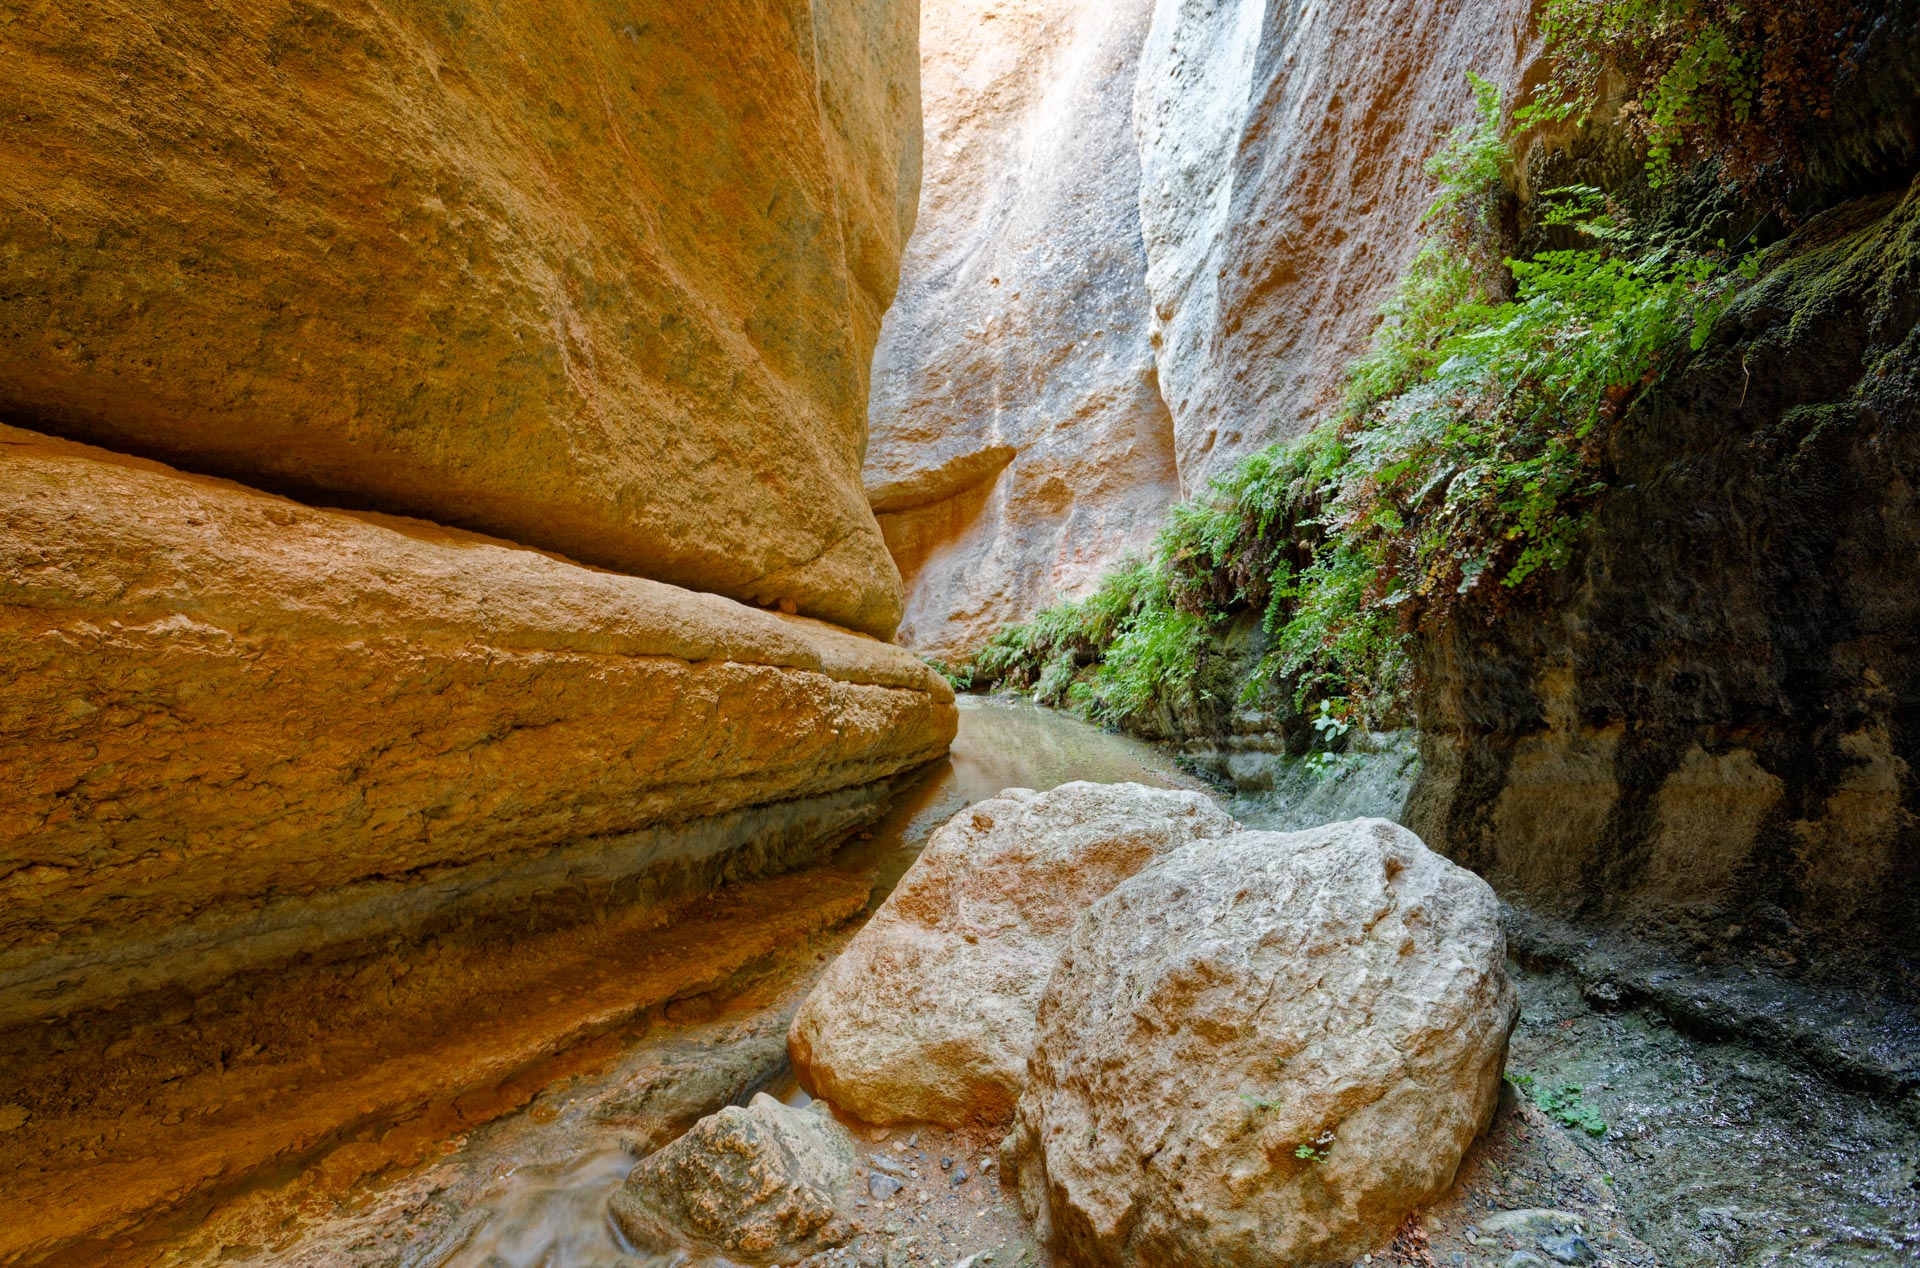
Light Adjustments
In this stage I’ve used the Smart Lighting Tool to adjust the spread of light across the image with midtones enhanced and highlights slightly suppressed. I’ve used the ClearView Plus tool to add sharpness and a little Microcontrast to highlight detail.

Colour Adjustments
Here, I’ve adjusted the white balance to make the overall tone warmer and enhanced the vibrancy a little to bring up some of the tones in the foreground rocks. With oranges and greens I’ve added a little saturation and decreased the luminance.
Advanced Colour Management
I was a big fan of the colour processing tools introduced in PhotoLab 5. The HSL wheel worked like a charm and in terms of colour grading alone it was possible to get excellent results quickly.
DxO PhotoLab 6 introduces re-engineered color processing algorithms that push the boundaries of color management, and a new, extended working color space. These are complemented by a Soft Proofing mode to ensure accuracy throughout the entire workflow, allowing photographers to make adjustments according to how their photographs will be reproduced for display, whether it’s on a high-definition screen or as a fine-art print.
DxO Labs
The Advanced Colour Space option has been implemented so that legacy images from PL5 are still available in the legacy colour space. You can toggle between the two. This is an interesting step away from the traditional switch from Adobe RGB to sRGB, which has always been a one way trip.. As good as it is to view a myriad colours on a high-end monitor, we shouldn’t forget that the end user will either be a printer in which case they will specify the required colour space, or an internet based viewer in which case they will see a reduced colour space. The Soft Proofing mode is a welcome innovation, bringing the capability of the editor much closer to Lightroom. If you want to get some detail on the new and improved DxO Wide Gamut Color Space, check out my review.
More Powerful Retouching
DxO PhotoLab 6 adds the new ReTouch tool that extends the capability of healing and cloning well beyond that of other RAW processing software. Photographers can now transform the source through mirroring, rotating, and scaling, or use brushes to fine-tune the area they’re editing into a more accurate shape. The new tool ensures fewer trips outside of DxO PhotoLab for complex cloning and healing tasks, and speeds up workflow while ensuring that editing never moves away from the original RAW file and therefore remains non-destructive.
DxO Labs
So this is where PhotoLab goes beyond being a simple RAW processor. The healing brush in previous versions was rudimentary, at best. This new capability brings it closer to Lightroom and if the intention is to reduce the need to visit Photoshop then PhotoLab is moving in the right direction. You can see in the image that I’ve removed a small plant from the bottom right hand side of the boulder in the foreground. The tool has definitely improved to the point of being usable!
There is also a ReShape tool in the Geometry section that overlays a grid across the picture. The grid can be reconfigured to make finer adjustments, and corrections are made by pulling the intersection around. I haven’t demonstrated it here because it makes little sense in this picture, but I did play with it. It is very powerful and for straightening discrete objects like a leaning lamp post for example it is more useful than the Perspective tool which applies more generalised corrections to problems like converging verticals caused by the camera not being level.
Final Touches
I’ve applied some Pro Contrast in Nik Colour Efex Pro and applied Deep Prime XD on export (This hasn’t been done twice, I used two copies of the original photo).

Is it Worth the Investment?
I still think that DxO is the closest competitor that Adobe have in terms of capability. With PhotoLab 6 DxO have kept the gap between them and their competition stable and the integration with the Nik Collection is a powerful argument in its favour.
On the downside, major version upgrades are appearing yearly and that pushes the cost of ownership up to around £90 a year whereas the Adobe Photography Bundle costs £119.76 on the monthly plan or £119.20 with a once yearly payment.- but you get Photoshop as well for those prices.
Let’s say I wanted to do all my processing with DxO. That would mean £90 a year for PhotoLab and £70 (upgrade price) for the Nik Collection. Suddenly that gap doesn’t seem so wide. Add to that a license for Viewpoint at £75 and you’re spending more money than you would with Adobe. Although Adobe don’t have anything in the same class as Viewpoint.
Cost of Ownership
The ESSENTIAL and ELITE editions of DxO PhotoLab 6 (Windows and macOS) are available to download now from the DxO website at the following prices:
DxO PhotoLab 6 ESSENTIAL Edition: €139
DxO PhotoLab 6 ELITE Edition: €219
Owners of DxO PhotoLab 4 or 5 can take advantage of a special upgrade price:
DxO PhotoLab 6 ESSENTIAL Edition upgrade price: £ 65 in the UK
DxO PhotoLab 6 ELITE Edition upgrade price: £ 89 in the UK

Verdict
If you’re the type of photographer who is happy to process everything in a RAW processor then I’d recommend PhotoLab and the Nik Collection without hesitation. If you embrace the DxO u-point technology you’ll find there’s very little you can’t achieve. Check out my review of Nik Collection 5 to see the possibilities.
So if you are considering one of Luminar, Capture One or ON1 Photo RAW then I’d recommend PhotoLab 6. It is a tool for creative photographers who want to remain in control of their images. This is achieved by producing an optically correct image to begin with and providing a set of powerful intuitive tools that can be used to build out from that base image. Check out A Workflow for DxO PhotoLab 6
If on the other hand you are used to Photoshop and layers based processing, then you may be faced with a choice. I belong in this category and I use Pure RAW or PhotoLab in a workflow that uses Lightroom simply to organise my library. I believe PhotoLab to be better at RAW processing than Lightroom and I can produce technically better images to take into Photoshop for further processing.
DxO PhotoLab is available in two editions, the Essential Edition and the Elite Edition.
Subscribe…
I’ll keep you in the loop with regular monthly updates on Workshops, Courses, Guides & Reviews.
Sign up here and get special prices on all courses and photowalks in 2024
I sometimes use affiliate links in our reviews and instructional material. If you purchase software or hardware through one of these links it won’t cost you any more, but it does help me to offset the costs of creating the content.
Thanks for your support!


Avoid DXO! I bought v5 less than two weeks before v6 came out (with no hint it was on its way) and they want me to pay another £89 to get the latest version. When I contacted their support I received a very impolite response that showed how little they care about their customers
DxO release on a 12 month cycle, like most of their competitors. I’m surprised that they wouldn’t offer a refund under the circumstances as digital purchases in the EU usually have a 14 day cooling off period during which you are entitled to a refund. See https://eur-lex.europa.eu/legal-content/EN/TXT/?uri=celex%3A32011L0083. I can’t speak for DxO but I’ve never had any problem getting refunds on digital products in the US or Europe.
To be fair, which software does have a good pricing model? Maybe On1, which is greatly lacking in camera support, or Luminar, which is extremely limited? There’s a big 3 of Adobe Lightroom, CaptureOne, and DxO, and I think DxO by far has the best pricing model.
Just an FYI – the Fuji XT 5 is RAF files are not supported (yet). So if your a raw shooter and are wheeling an XT 5 look elsewhere.
By the way great article.
Thanks Don, that’s an essential piece of information that I really should have included. It’s been a perennial question for a few years now.
The handling of noise is really good, and apparently the difference between DeepPRIME and DeepPRIME XD means that I have to buy PhotoLab 6 and pay 100 USD more to get the best result with my raw files. This nature of blackmail strategy annoys me.
But ok, what will I get more for the extra money? A lot actually. A number of tools are quite sophisticated, but the masking tool is not. I can’t decide the color of the indicator, the Edge mask doesn’t show its edges! and it’s not possible to combine an Edge mask with a standard mask. I can’t draw a straight line with: left-mouse-button ->shift->new position->left mouse button, which is standard with most masking tools. This masking tool is way behind the current masking system in Adobe ACR and Lightroom (Dec 2022).
Among the few directly annoying details is, that the result from DeepPrime XD isn’t updated to the editing screen and is difficult to evaluate from the small loupe.
On my Lenovo laptop the DeepPRIME XD processing takes several minutes and the final export to e.g. a DNG is another time consuming process.
I’ll probably buy The Photolab 6 to get DeepPRIME XD, but the extra tools will not be replacing my Adobe ACR workflow in this case – only DeepPRIME XD with the Lens sharpening is really attractive.
These are valid criticisms, I find myself using PL6 more as a raw processor than a complete toolkit for all processing. LR continues to manage my libraries. So far as RAW processing goes, I have the same view of Lightroom itself, some photos can be completely processed in PL or Lightroom (PL still has the better RAW processor), others need to go to Photoshop or Color Efex for some extra steps. PL continues to evolve and offers some very nice features, noise reduction being a significant differentiator.
Your price comparisons are wrong. The Adobe Photography Plan (20GB) is 119.76 pounds per annum
for Lr + LrC + Photoshop & 20 GB storage.
Thanks for letting me know. I’ve updated the article with latest prices.